Smart CHoice Method Guideline #3:Be prepared and Plan ahead!

Ok, so its not so much fun as it is good to do but being prepared sets you up for succeeding by offering you a positive choice.  The old adage “when you fail to plan you plan to fail” can be changed when you have short cuts already in place.

Guideline #3: Being Prepared by Planning ahead!

A year ago I never would’ve seen myself being this prepared; having cut up veges, washed apples and single portion chicken in the freezer.  I would’ve been haunting my pantry and doing multiple runs to the grocery store…but when I got smart and realized there is a better way to eat I found that being prepared is the only way to go!

Strategy #1–Pick a day of the week when you have a little bit of time and try to plan out your main meals for the next week.  Believe me it takes practice, and you may find yourself eating the same things over and over but starting to do it is what counts. Have ‘backup meals’ in case your plans go haywire. Make up a grocery list and buy anything you don’t have on hand. No last minute shopping if possible (you’ll save on your grocery bill big time!)

This is something my daughter made for me so I can plan out meals and exercise against my commitments.  This has been the result of several revisions but it may not work for you–simply design one that fits better–if you like it, you’ll be more apt to use it!

Food and Fitness Planner

Strategy #2Once you have a general plan of your main meals you can start prepping. Things I try to have ready to go? Cleaned and cut up carrot slices, red and green peppers and celery–these are great for snacks with hummus, peanut butter or salsa and make stirfries quick as can be.( I find its easier to pass up on chips if these are available.) Wash apples, grapes and other fruits so you can just eat them. Have bananas on hand; slice them and stick in the freezer for smoothies or ‘banana ice cream‘.  Strawberries can be cleaned and frozen as well for smoothies. If you are a salad person try setting up salads so you can just grab one and have it for a quick lunch or meal–I find if I have to start from scratch for each salad I don’t make them at all.

You can do prep with protein as well. I try to buy family portions of boneless chicken breast and freeze them in individual freezer bags. This way you can just take out the portions you need instead of defrosting the whole package. Depending on how much you use it, you can cook 3-4 breasts in a crockpot and then shred them so they are ready to go in enchiladas or ‘pulled chicken’. I normally cook them plain but you can season them with taco seasoning or other flavors depending on how you plan to use them. I make lean beef burgers ahead of time by also buying the 3-4 pound pack of lean beef, measuring out portions, forming patties and storing in the freezer–no more fatty patties to sabotage your efforts! You can use your imagination to what you will actually use and eat if it were readily available.

Strategy #3–Make and store ” reheatables”. Oatmeal, chili, stews, lasagna–pretty much anything you can make ahead and then freeze or use in the next few days.  These are also know as “Planned Leftovers

As you know, I love oatmeal and I tend to make either the ‘overnight refrigerator oatmeal’ in warmer weather (eat cold) or the Crockpot oatmeal in cooler weather (which re-heats nicely).  My husband laughs because I tend to store my portions in mason jars when I can so I just can grab one and know it is ready to go.

But do these things actually work? Is it worth the time planning and prepping? Yes! It drives me crazy when it gets around to dinner time and I have no idea what to have.  I try to have a well stocked pantry with broth, beans, brown rice/pastas and a good selection of veges in the fridge/freezer, but planning ahead–its just so much easier than trying to throw something together. Try it for a week or two and see if it works for you.

Let me know what Strategies you use to make your eating meals easier and healthy ~Janice

The Smart Choice Method-Guideline #2: Get as Natural with your food as possible

One of the biggest things that makes a difference, in my opinion anyway, is getting back to eating food in its most Natural state. Wouldn’t you rather eat this freshly grown tomato than one from a can?   This one is from my garden, grown without chemicals or pesticides.  No preservatives were used to extend its life and it tastes like a tomato is supposed to taste!

Guideline #2: Get as natural as possible with your food (eat as close as you can to its natural state)

Once I made the decision to “clean up my diet” the first thing I did was to really start reading labels. I was amazed at how many ‘preservatives’ and chemicals were in most products claiming to be good for you. Sugar, salt and fat are hidden in plain site–but under many names most of us don’t realize they are there.  Start reading labels of what you are eating. Part of the problem is that its not illegal to list sugar as 3 different types to get ‘sugar’  off the top 3 ingredients to make it look healthier. Learn how to read labels to discover what is really in there.

Take a look at frozen meals. Now I am not saying you need to eliminate them totally, just be aware of what is there. Guidelines are fuzzy because if a ‘nutrient’ falls below a certain number they can round it down and call it zero. So much for honesty in labeling. Look at  your label–if its high in sodium they might boost the potassium to ‘balance’ it out. The trouble is that the sodium is still there affecting your body.

My method to deal with it was to  make as much of the food you eat from scratch. Yes, it does take a little more time and effort but that is part of eating healthier by planning ahead (Guideline #3). When you can take the wholesome parts and create your own meals based on what you like to eat (Guideline#4), and they are ready to eat, you are more likely to eat healthier less processed food. 

One of my easiest things to make? Oatmeal. I love oatmeal! Don’t use the prepackaged ones, they are loaded with sugar and stuff. Use real oats, the old fashioned ones are great for on the stovetop–they cook in just minutes and you can use either water or milk as the liquid and add in any fruits you like. Top with a little maple syrup or honey and you are good to go. When it got warm I switched to “refrigerator oatmeal” which bumped up the nutrition with Greek yogurt and fruit.  Now that it is cooler again I switched to “Crockpot oatmeal” which uses steel cut oats.

Another thing that is super easy? Vegetables! Spend a half hour (or less) prepping carrots, peppers, celery etc and keep it in containers so you can grab and snack. I eat them with hummus, peanut butter, salsa or even plain. By having them ready to go I eliminated heading to the pantry for chips and processed snacks.

No matter what you choose to do, the idea is to eat real food, the kind that does not need a label to know what it is. Try to eat fresh fruit and vegetable, lean meats (if not a vegetarian) and dairy/eggs in their most basic form and experiment with recipes to keep your food ‘clean’ from chemicals and additives. When you do use canned or frozen food, read your labels to understand what you are adding.

Let me know what you think. Do you think eating less processed food and more fresh food makes a difference?

Smart Choice Recipe: Buttermilk Bread

#smartchoiceshealthyliving.com#buttermilk bread
Homemade Buttermilk Bread

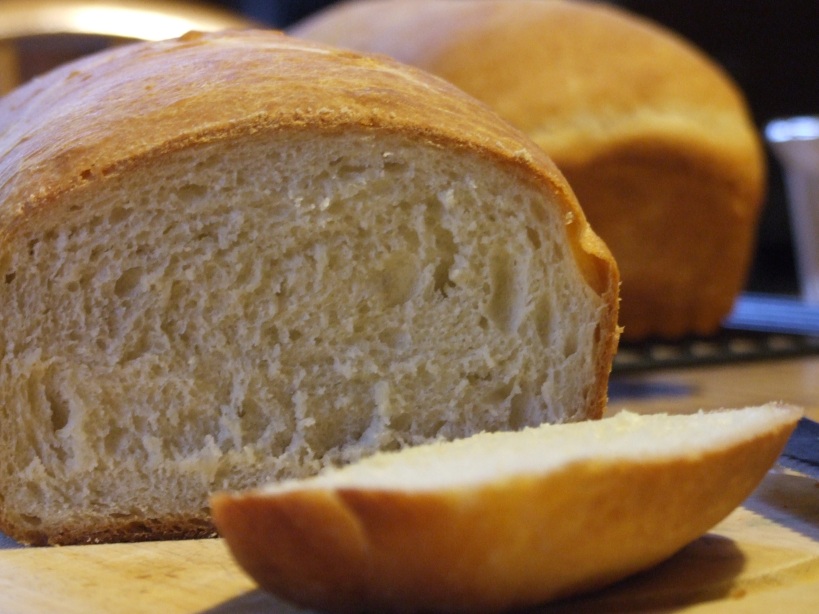
Homemade bread–there  really is nothing better! I love to make bread–the smell of the yeast, the feel of the dough–its just very soothing.  My newest love–Buttermilk Bread. Honestly I had only really used the buttermilk in biscuits or in Irish soda bread. I saw this recipe on a post from Fullbellies. I became intrigued enough to try it.It is essentially their recipe with just a couple minor changes.

Buttermilk Bread

1 cup water

3 Tbs butter

1/2 cup water

1 package active dry yeast ( or a shy Tbs if from a jar)

1 cup buttermilk

2 Tbs honey

1 Tbs sugar

2 tsp salt

1 tsp apple cider vinegar

6 cups bread flour

1-In a small sauce pan heat water and butter and allow butter to melt. Set aside and cool.

2-In a small bowl dissolve yeast in water, set aside.

3-I use a Kitchenaid mixer with the paddle blade but just use a large bowl if you don’t have a stand mixer. In bowl add buttermilk, honey, sugar, salt and vinegar, mix on low to combine. Add butter water and yeast water to mix.

4- Start adding flour 1 cup at a time until combined. At 5 cups it will be stiff, switch to the dough hook if using the Kitchenaid mixer,or start kneading in the remaining cup of flour by hand by putting the dough on a floured surface.

5-Knead for about 5 minutes (either by hand or with dough hook)–it should be smooth and elastic at this point.

6-Placed in a large bowl (glass works best) coated with nonstick or butter and allow to rise in a draft free spot for about 45 minutes. Cover with a dish towel.

#smartchoiceshealthyliving.com#buttermilk bread

It is ready to work with when it is doubled in size.

7-Punch down and turn onto a floured surface. Divide in two and roll out/stretch with your hands to get out extra air bubbles.

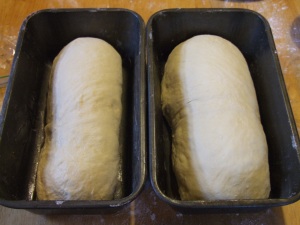
Starting at the end closest to you and roll up, tucking ends underneath. Place in a bread pan coated with nonstick or butter. Cover and allow to rise another 30-45 minutes. Halfway through rise time preheat the oven to 375*F.

#smartchoiceshealthyliving.com#buttermilk bread

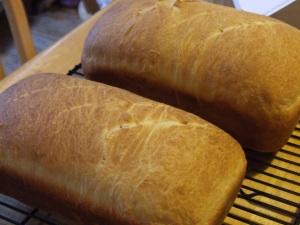
8-Melt 1 tbs butter–optional but it gives it a nice crust- and brush on tops of breads. Bake  in preheated oven for about 45 minutes or until golden brown. Let cool in pans 10 minutes and then cool completely on a wire rack.

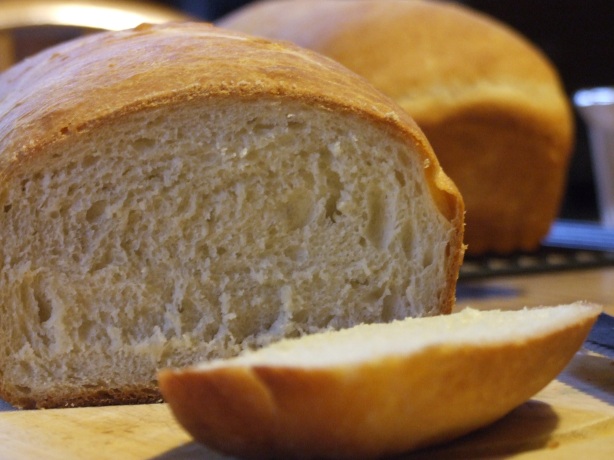
9-Slice using a serrated knife and enjoy!!

#smartchoiceshealthyliving.com#buttermilk bread

Homemade Buttermilk Bread


Smart Choice Recipe: White Chicken Chili

#smartchoicehealthyliving.com,#White Chicken Chili

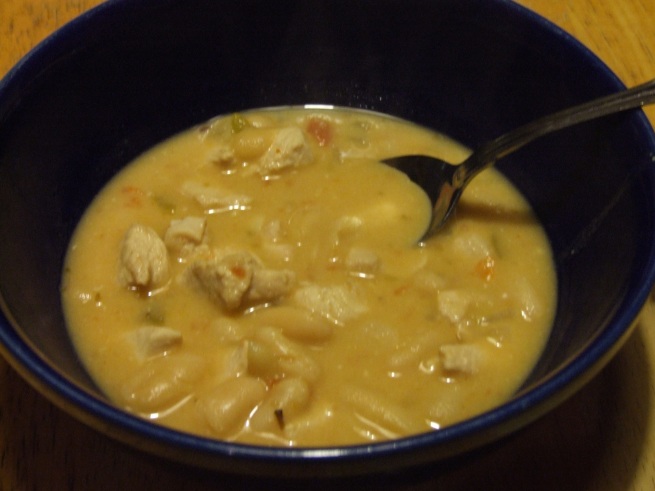
White Chicken Chili is a great alternative to a beef  based one yet it still bursts with flavor and heat.  My husband recently tried this chili at Ruby Tuesday and it became his new favorite. The only problem is when it is not made at home you can’t control what goes into it. ( The nutritional information says its only 300 calories but over 1900 mg of sodium per portion!) If you do an internet search for  the “WCC” you will get tons of recipes but none of them were exactly what I wanted….so here is our version.

Smart Choice White Chicken Chili

1 lb boneless chicken breast, diced (bite size pieces)

1 large yellow onion, diced

1 Tbs olive oil

1 Tbs garlic, minced (about 2 large cloves)

3-4 cups chicken stock (or broth if that is what you have), homemade or low sodium is preferred but…use what you have on hand. (use 3 if you like it more thick)

3 cans (15 oz) white northern beans (cannelloni), undrained

1-2 cans (4 oz) of chopped green chilies (optional)

1/2 tsp black pepper

1 Tbs cumin

1 tsp oregano

1/4 tsp cayenne pepper

1 cup salsa (I used medium)

1/2 cup half and half

1/2 cup sour cream (I used light)

Grated cheddar or Jack if desired for topping

1-In a large pot ( a heavy bottom one works best) heat the olive oil on medium heat then added the chicken and onion, stirring frequently until chicken is cooked and onion is soft and golden, about 5 minutes.  Add the garlic and cook another minute or two.

2-Add beans, spices, broth, spices, salsa and green chilies ( everything except half and half and sour cream.  Simmer over low heat for about 20 minutes. If you like a thicker chili only add 3 cups broth.

3-Remove from heat. Stir in half and half and sour cream.

4- After served add optional cheeses but it really is good without it.

#smartchoicehealthyliving.com,#White Chicken Chili

We also served it with freshly made Buttermilk Bread.

Homemade Buttermilk Bread

Buttermilk Bread

The Smart Choice Method-Guideline #1: Focus on health and feeling good

Ok, if you read the intro for this post you already know what I am talking about. For those who skipped that one–I was questioned about how I lost weight ie what diet plan I was using. The funny thing is I’m following my own plan and these Guidelines will expand on what I did to get healthy AND lose weight as a side effect.

Guideline #1: Focus on the Healthy reasons you want to lose weight and not the weight loss itself.

I think this is the biggest factor in maintaining the desire to keep eating healthy and increasing/being active. There are a million little ways to evaluate feeling better and making healthy progress than the ones you see on a scale.I’ve read a few articles that also reinforce this point. “Dieting” is usually seen as a short term goal and often for an event like a wedding or reunion where you are looking to impress someone else. When you change the focus of WHY you are looking to lose weight and be healthier (ie feeling better, lower blood pressure/ blood sugar/ cholesterol) you actually put more effort into attaining that goal rather than just looking to lose weight (an ambiguous social driven goal).

I had faced the possibility of having to take blood pressure and cholesterol medications last December and I persuaded my PA to give me an opportunity to work on it with diet and activity. Less than 6 months later I had taken my blood pressure from 140/80-90 to 100-110/60-70 and my cholesterol had dropped about 50 points–all through simple dietary changes and increasing my activity. I did not do anything drastic, I did not starve myself or exercise like crazy.

I cleaned up my diet and started walking. Its that simple. Before YOU make any changes talk to your doctor. Have them get some baseline labwork and maybe even an EKG. We all have different levels of health status so you should work from that point to improve your health.  Most doctors get very little training on nutrition and exercise so you may have to do some research on your own to improve your health but always get them on board for any monitoring you may need.

There are many “unseen” benefits of focusing on health–the “non scale victories” that make a bigger difference in your life rather than a half pound weight loss.

Non-scale Victories (NSV) include:

* your clothes fit more comfortably-waistbands are looser and you can breathe!

*you can walk farther without getting out of breath

*you have more energy naturally and can cut back on coffee just by drinking more water

*you get a healthy ‘glow’ to your skin (people will ask you if you changed makeup!)

*you can take the stairs–because its more activity to count

*you sleep better at night (and maybe even snore less)

*you actually look forward to being active and getting sweaty

*you make new friends who are also health conscious

These are just a few of the many ways being healthy makes you feel better than just losing weight. Oh–and most people who do lose weight–they usually gain it back and then some. Focus on healthy and the weight will come off naturally.

So– are you focusing on healthy living? Is it time for some simple changes? Check in tomorrow for the next Guideline…

Guideline #2: Get as natural as possible with your food (eat as close as you can to its natural state)

Make Smart Choices~~Janice

The Smart Choice Method of Healthy Living

I’ve always believed that it is not the person with the loudest voice that gets heard, but the one who quietly shows others by example.  The person who lives what they say actually speaks the loudest of all.

I’ve really been focusing on living healthy, not dieting, for the last 8 months or so. I’ve developed my own eating plan, not liking any one “diet plan” enough to ‘name’ my way of eating. Its a kinda  “modified clean eating- almost vegetarian-make ahead-portion aware-no rules” way to eat. I guess the biggest thing is that I don’t like absolute rules for eating  because rules lead to cheating and cheating leads to guilt.  Confusing maybe, but its been working for me.

I had someone ask me this morning “where to find my diet plan” since she decided she needs to lose weight.  She had overheard a conversation where another person had asked me how much weight I had lost and I had to reply I didn’t know, I had been focusing on eating healthier and lost the weight as a ‘side effect/benefit’. When questioned further I emphasized I had cut out processed foods and focused on fresh foods, pretty much the basis of my focus.

As we talked this morning it got me to thinking and I offered a few quick pieces of advice to get her started but it made me evaluate my own Guidelines for Healthy Eating…..and I started working on this blog–only to find I had way too much to say for one blog. So, this will actually develop into a series of posts about how I’ve gotten more healthy and lost weight along the way.

Lets call it  The Smart Choice Method of Healthy Living. Each of the next posts will focus on and explain one of these things that has guided my sustainable healthy life.


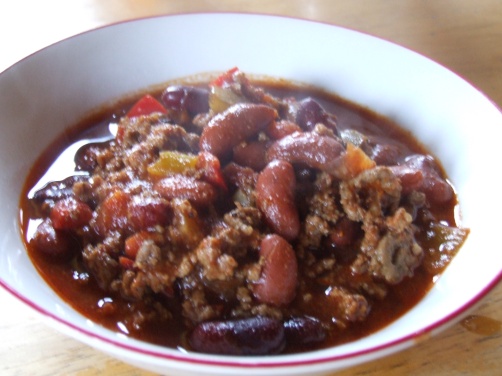
Smart Choices Recipe: Dad’s Chili, updated

Fall is the perfect time to pull out those comfort food recipes and “healthify” them. One of my favorites is Chili. There are so many versions of chili out there: green, white, red, beans/no beans, vegetarian, chicken, turkey, beef…..the list goes on and on–but this one has to be my hands down favorite. It is full of seasoning with just a touch of ‘back heat’ that lingers rather than an “in your face, give me a glass of water” hotness that is actually hard to eat.

When I make chili I always think of my Dad, he always made the best chili when I was growing up; full of flavor and chunks of meat and veges. Unfortunately I could never get him to write the recipe down before he passed away so I’ve had to improvise to make my own version.  I originally found this recipe in Yankee Magazine titled “Booma’s Revenge Chili” and have changed it around a bit to make it mine. I cut back on the meat, added more veges, eliminated the serrano chilis, tweaked the broth and added more beans….but otherwise its pretty much the same, okay so its not really the same at all.

Dad’s Chili, updated

2 lbs lean ground beef

1 Tbs olive oil

1 medium green pepper, diced

1 medium red pepper, diced

1 medium onion, diced

4 large garlic cloves, minced

2 cups low sodium beef broth

6 TBS chili powder

3 TBS cumin

1/2 tsp dried oregano

1/2 tsp black pepper

2 cans 15 oz diced tomatoes (I used low sodium and fire roasted)

1 can 6 oz tomato paste

2 cans 15.5 oz kidney beans, rinsed and drained,(I used 1 light and 1 dark)

1- If you have time brown the meat ahead of time and allow to drain over a colander to get out the fat other wise just brown the meat in a large pot and remove as much of the fat as you can. I like smaller pieces of meat but break it up to your preference.

2-Either set meat aside and re-use the pot or in a second pot heat the oil

and then saute the peppers, onions and garlic for about 5 minutes or until softened.

3-Combine the meat, veges, beef stock, spices and tomatoes

(pretty much everything except the paste and beans) in a pot and

allow to simmer on low heat for about an hour, stirring occasionally.

4-Add the tomato paste and cook for another 20 minutes

then add in the beans and cook for another 10 minutes.

Of course, recipes are just a starting point and are meant to be personalized. I like more “juice” in my chili so I used more broth but feel free to use less (or add more tomato paste) if you like it thicker. I love using the veges and beans but add less or eliminate if its not something you like. Initially I also questioned the amount of chili powder and cumin but it really makes it nice and flavorful, not overwhelming.

If you give it a try, please let me know how you like it. If you have a recipe you love, please share it! I love trying new recipes to see what I can add to our healthy repertoire

Enjoy~~Janice

A Smart Choice: Rustic Baked Potato soup

I love soup in the Fall!!  There are so many choices and flavor options that some times it is hard for me  to decide which one to make.  Baked potato soup has always been a great choice  and this one has developed over the years to be my ‘go to’ soup.  It originated from a Weight Watcher magazine recipe that has been tweaked and adapted to fit my tastes and improve on its nutritional values.   Even if you are not an experienced chef you can put this one together quickly and have a healthy lunch or dinner ready when you need one. Granted its not a ‘clean eating recipe’  in the true sense but its much better than anything you’ll find in a can!

One of the nicest things is its adaptability; I’ve shared its original basic recipe and seen many variations on a ‘loaded’ baked potato and with chopped broccoli, petite shrimp or as a ‘faux New England Clam chowder’.

My favorite is the Rustic Baked potato version.

                            Rustic Baked Potato soup

4 Medium baking potatoes (I use Russets)

1/3 cup all purpose flour (King Arthur)

4 cups 1 % milk

1/2 tsp freshly ground pepper

4 ounces Velveeta cheese (I use 2%)

1/2 cup light or fat free sour cream

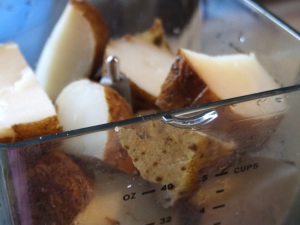
The easiest way to do this is to bake the potatoes in foil while you are using the oven for other things and then let them cool in a zipper bag.  I usually bake them in a 400*F oven for an hour depending on size (they should “give” when you give them a gentle squeeze). You can make them the same day as the soup but it means more prep time since you need to let them cool a little before the next step.

If you have baked the potatoes ahead of time quarter them and add them with the skins on into a food processor (I have a Ninja Kitchen system 1100) and use the blade with pulses to chop them to fine chunks. If you don’t like potato skins you can remove the skins before this point; if you cooled them in the zippper bag they will slide off fairly easy.

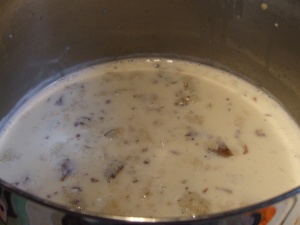
In a large sauce pan add the flour and whisk the milk into it until smooth. Add the chopped baked potato, and pepper. Cook over medium heat until it is thickened, about 5 minutes or so, stirring frequently.

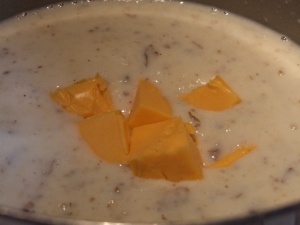
Add the Velveeta and stir until melted, it’ll change into a nice light golden color.

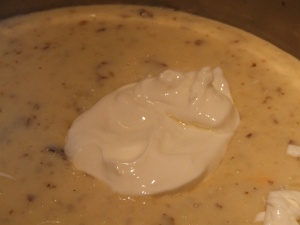
Remove from heat and and stir in the sour cream.

This makes about  six  1 1/2 cup servings. Serve as is or top with your favorite “loaded baked potato” topping like green onions, bacon, finely chopped broccoli or whatever strikes you fancy.

I normally store leftover in a jar so they easily transport for work–you can reheat them right in the jar using a microwave, just make sure to remove the metal ring and cover to avoid splatter.

How Can I Include More Nutritious Food in my Diet?

Wellness Secrets of a SuperAger

One of our problems in this junk food filled world is that our taste buds get distorted by those over-sugared, over-salted, over-fatted foods. Not only fast foods, but also most processed foods are loaded with these ‘extras’ to extend the food’s shelf life and to take a cattle prod to our taste buds.
Check out my post – A Love Letter to Hostess Ho Ho’s – NOT for more details on this.
Trying to get off these foods can be frustrating because unprocessed healthy foods don’t create the same reaction in our mouths. We bite into fresh fruit and it doesn’t explode on the palate like McDonald’s Frozen Strawberry Lemonade. We need to guard against the erroneous conclusion that the fresh fruit doesn’t have much taste. I don’t mean to single out Mickey D’s except that they are the biggest fast food chain and sell the most.

I wrote about…

View original post 460 more words

I exercised …but I didn’t like it

There are just times you know you are not going to have a great work out but you talk yourself into it anyways…..yesterday was one of those days!

My daughter and her boyfriend wanted to go tot he gym after school and I said I would take them, even though I didn’t feel like going. Well it makes no sense to go to the gym and not do anything, right? SO I got dressed and hopped on the treadmill–the kicker? I left my ipod at home on the charger but I had the headphones …into the TV it was (I watched House). Not even 5 minutes into the walk my foot started to kill me–I have this issue with my ‘big toe joint’ on my left foot (it isn’t gout, or a fracture or anything we/I can figure out) and I toughed it out for 22 minutes and decided it was enough. I switched over to the recumbent bike for another 15 minutes (my daughter was done).

Am I glad I went? Yes. Would I do it again that way–I am really not sure. I do believe in pushing your body a bit but to exercise in pain? Yea I don’t think so– on those days I think I would stick to the bike and weights.

Thoughts? Do you exercise in pain or push yourself when you mentally are not in the mood for exercise?

What are your ‘talk yourself into it’  conversations like?